UIUCTF 2022 - revop (1 solve)
August 1st 2022
revop (1 solve)
Tags: rev, ml
No machine learning required!
Challenge
PwnyOps has been working on some custom ops to use in our CNNs.
We were able to compile one of our models as a shared library file containing the custom ops.
However, the ONNX team messed up during export and the ONNX file just contains the names of the custom ops, and not the actual implementations.
Can you reverse the compiled model to get the implementations and add them to the given ONNX file?
We will use your ONNX file for inference, and if the results match those of the compiled model, you will get the flag.

$ nc revop.chal.uiuc.tf 1337

author: boron
Solve
When we extract the handout we get two files, the model_src.so and
the model_dist.onnx. According to the instructions we have to
reverse the .so to modify the onnx to behave the same way as the so.
Since this is my first time seeing an onnx file i googled a bit and it turns out it's just a bunch of protobuf things held together with a bit of duct tape. But at least there's a nice python api for it.
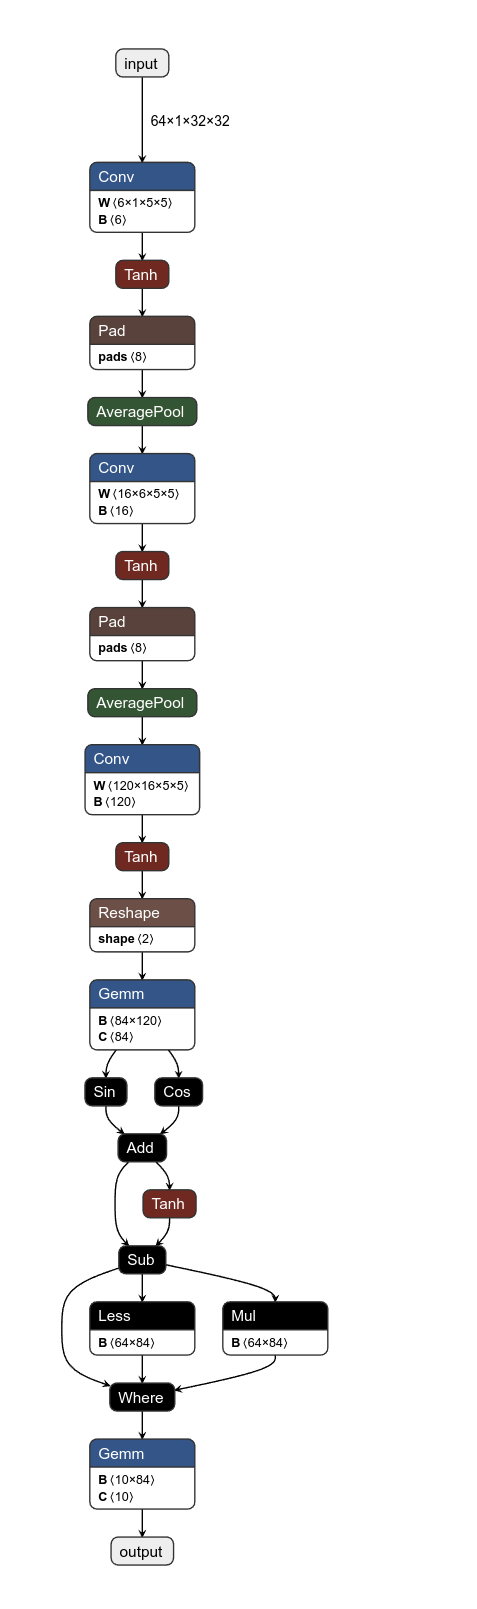
There's also Netron which can visualize the nodes of the graph, which is helpful for debugging and visualizing. So the first thing I did was to visualize the graph we were given.
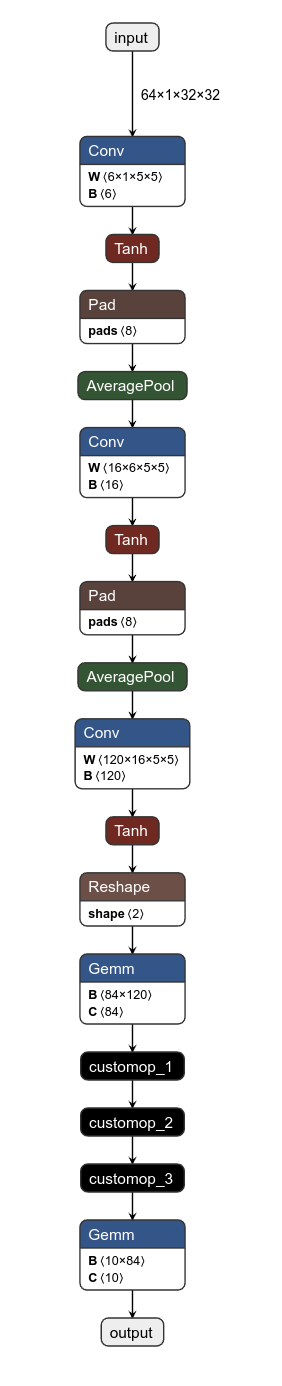
We see some easy stuff like convolutions and element-wise hyperbolic tangent. The three custom operations are what we first need to know. And for that we need to reverse the binary a bit.
Reversing
After opening the so file and looking a bit through it it becomes
relatively clear that the main part is in main_graph. We can also
see many many variables for relatively little code, which probably
means it's a SSA form (which seems odd, considering they want it
as fast as possible...).
First some cleanup, which means retyping stuff (mostly telling ida that variables are actually floats and not the int 0x3C23D70A and making sure that all the arrays contain floats).
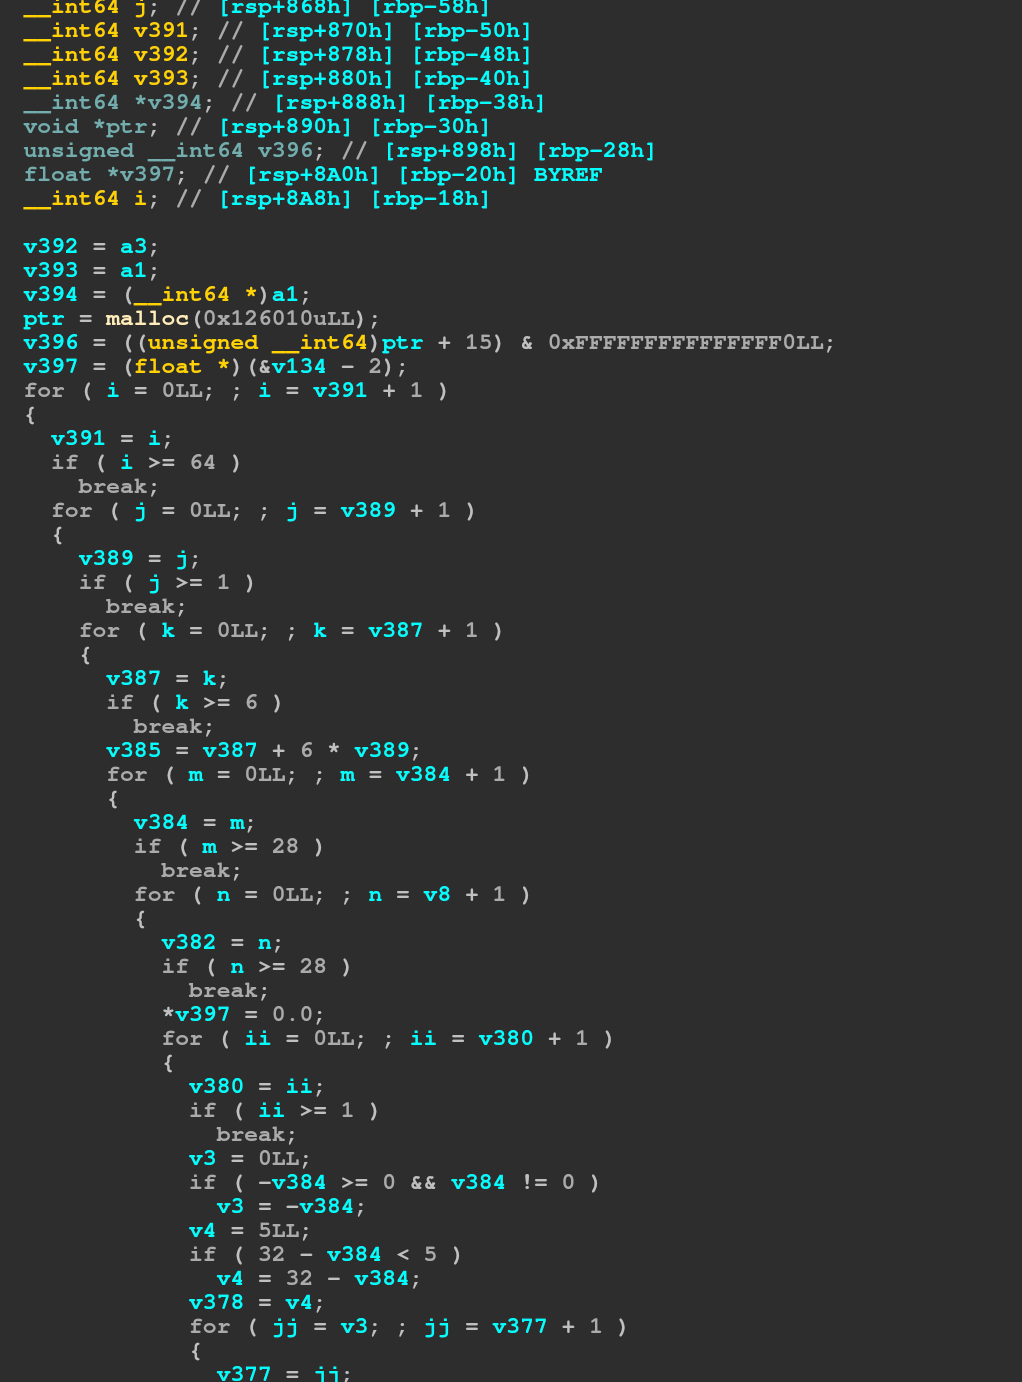
After that some clean up concerning the variables, if a variable is set to another variable (and not used after that other variable is modified), we can map it to be the same variable. This already gives us a much better view of the code:
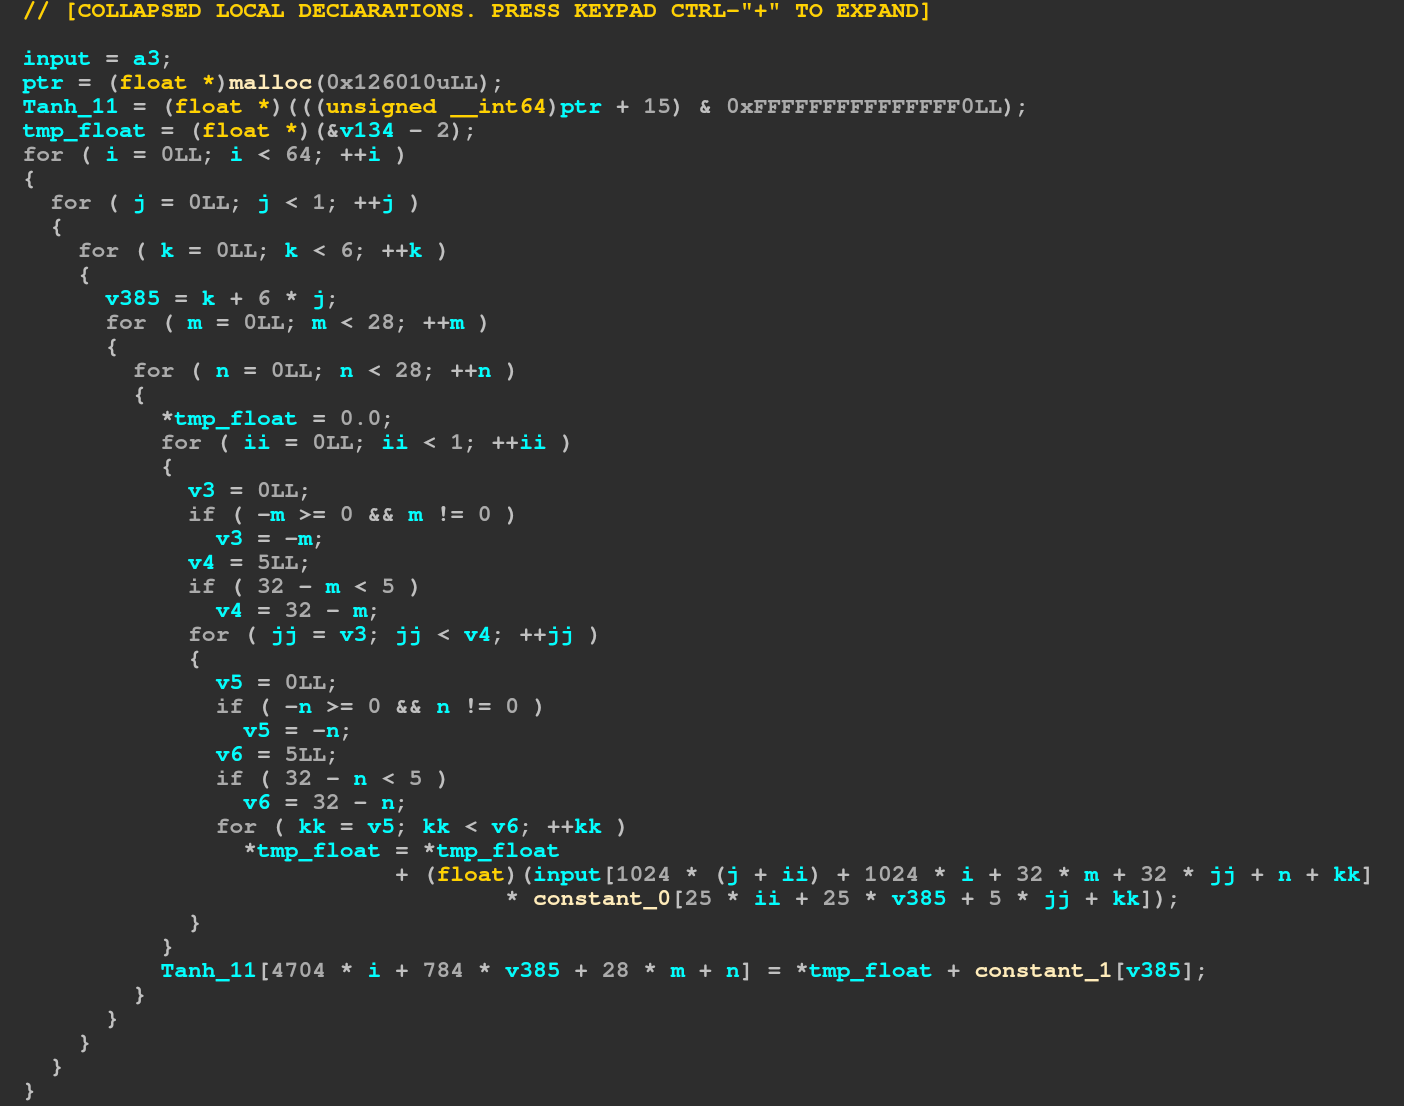
We can see that the first thing it does is to allocate a buffer, then make sure the buffer is 16 byte aligned (the size in the malloc is 16 bytes greater to make sure we can do that, so the actual size allocated is 0x126000, which matches the size (64,6,28,28) floats we iterate over in the loop). We can also see the index into the input clearly using the input (64,1,32,32) size (i and j from the outer loops, m and jj from the inner loops).
So this first loop is the first convolution and the weight and biases from the constant tables should match the ones in the onnx? Well yeah I guess they should, but they don't. (However the admins said the ones in the onnx are correct, so no need to worry about that).
The next block is a Tanh block and looks like this:
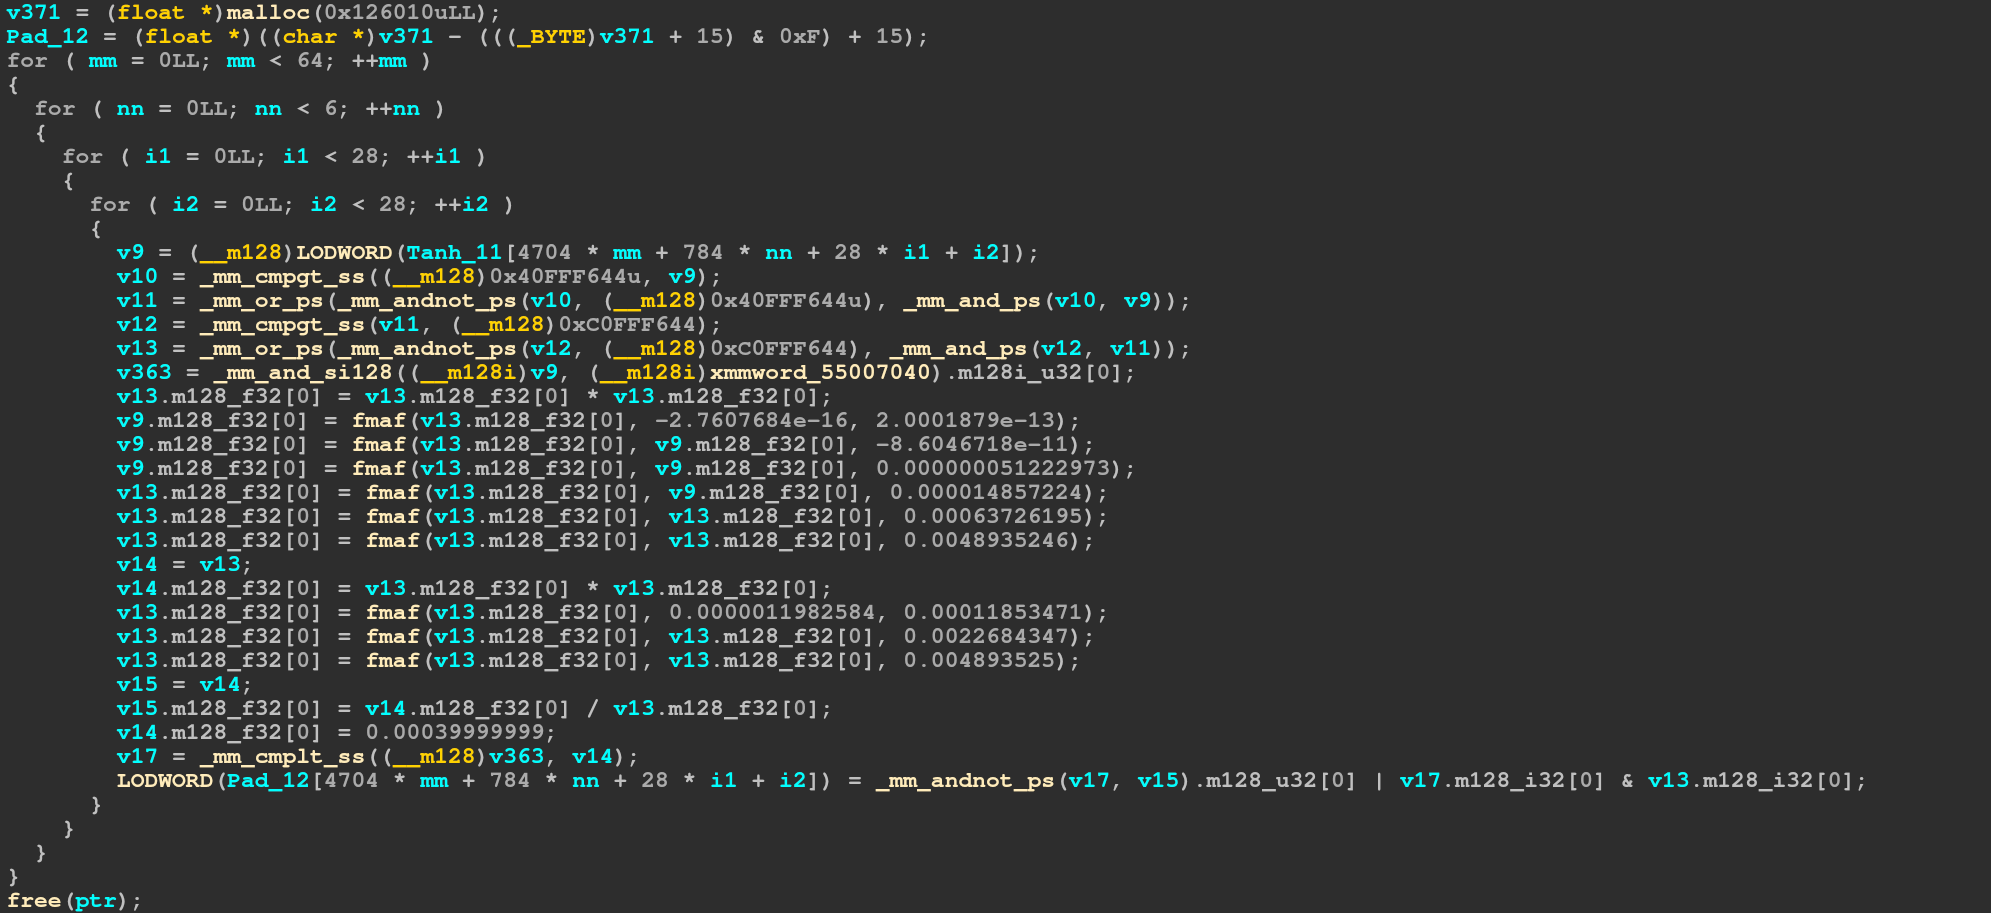
We can see it does some vectorized magic to get the correct value for tanh. Counting the number of those blocks in the decompiled view gave me four, the graph contains only three though; I wonder what that means...
Anyhow, skipping blocks until the first custom operation (the remaining ones are pretty uneventful, the operation they do can be inferred from the name, maybe important is the reshape which resizes the matrix to (64,-1) where -1 just means to automatically choose the correct size).
Looking at the first operation it is pretty clear what it does:
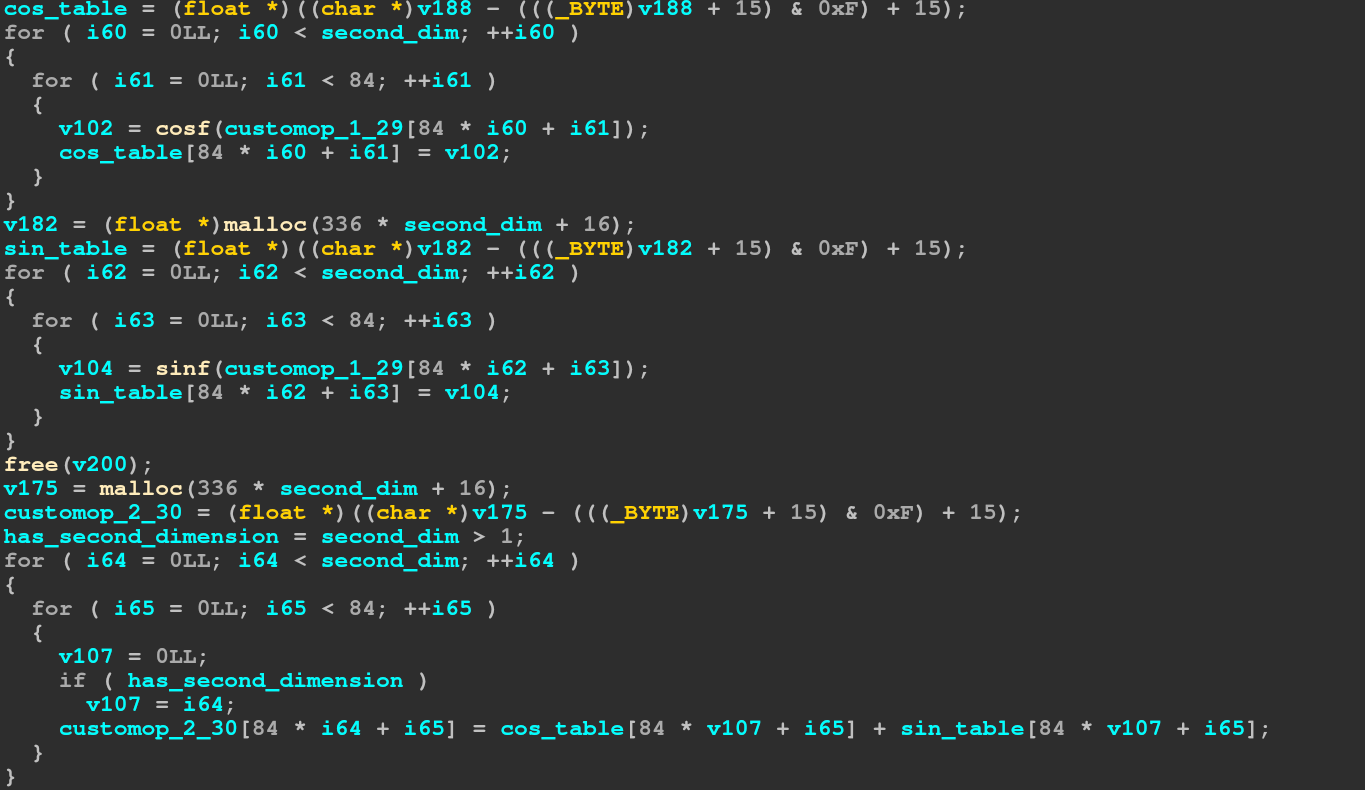 It first computes the cosine of every element, then the sine of every element,
finally it adds those two matrices to get the final output. The second operation is
a bit harder to see through, but since we know how a tanh block looks we can see that this:
It first computes the cosine of every element, then the sine of every element,
finally it adds those two matrices to get the final output. The second operation is
a bit harder to see through, but since we know how a tanh block looks we can see that this:
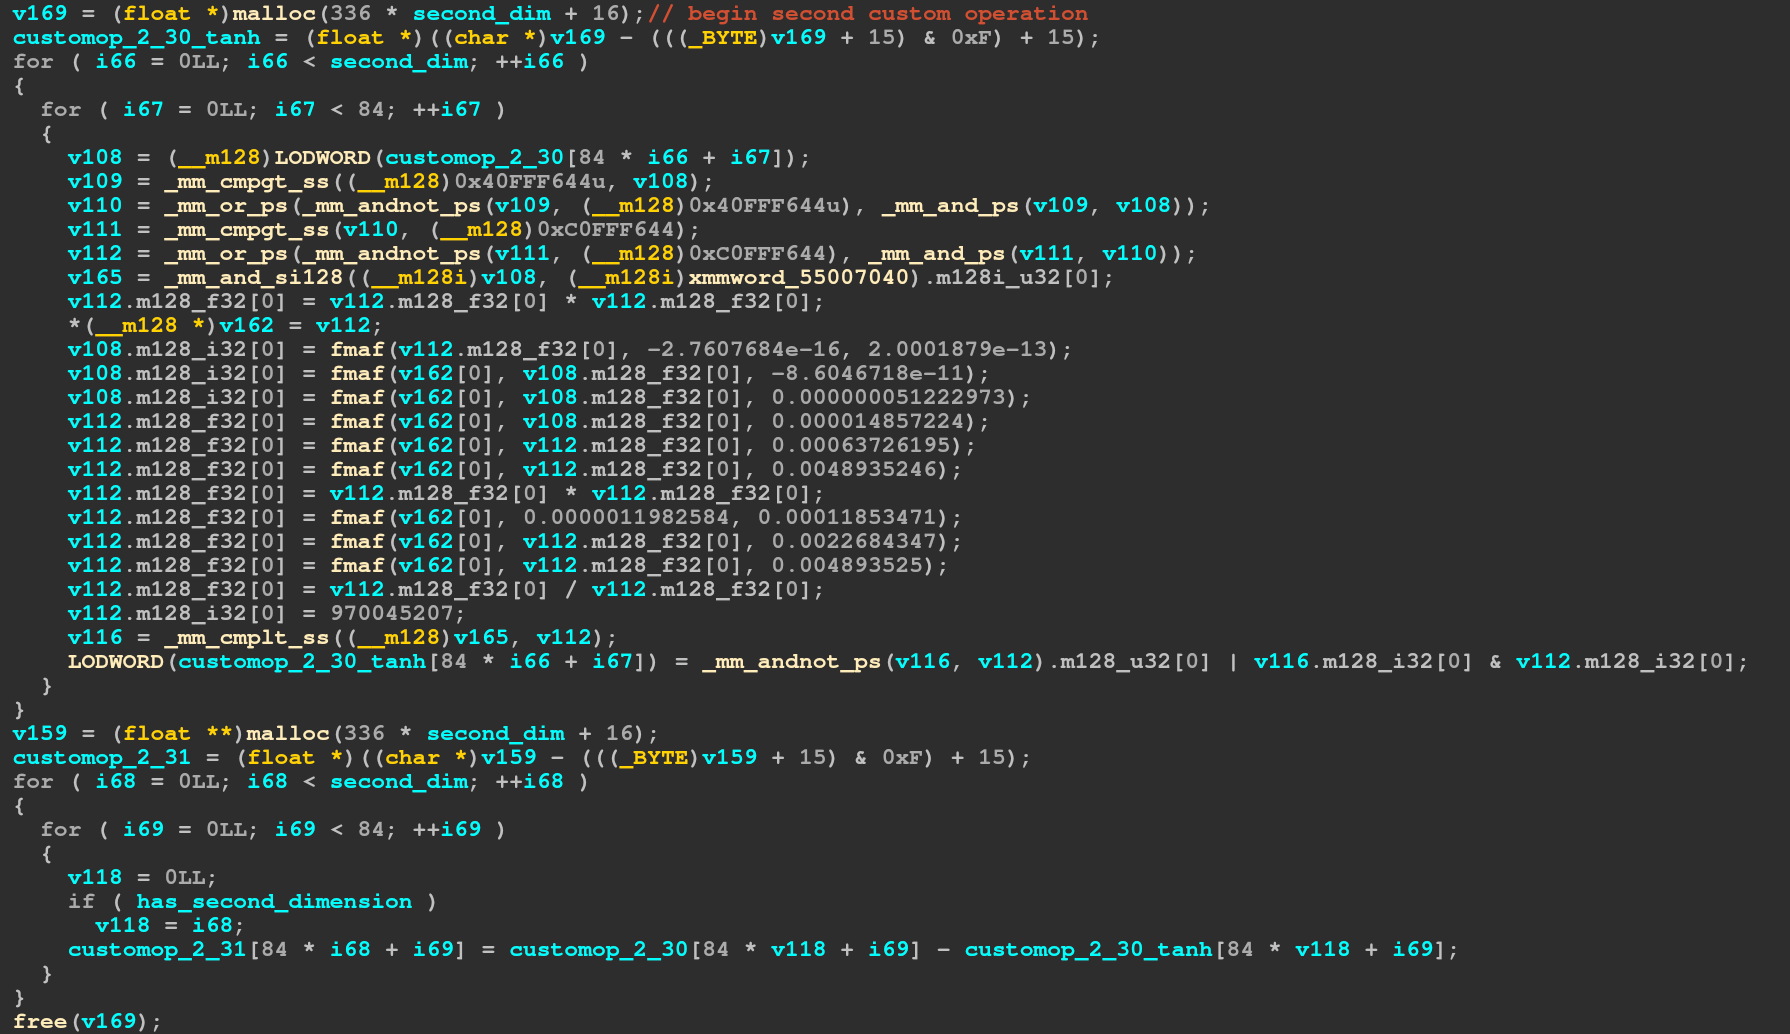 is just calculating tanh for every element, then subtracting that value from the original
input value. The third operation is just decoding the sse intrisics:
is just calculating tanh for every element, then subtracting that value from the original
input value. The third operation is just decoding the sse intrisics:
 As commented
 _mm_cmplt_ss just means to compare the single float and returning
-1 or 0. It seems that ida does not really know that cmplt_ss only requires 32 of
the 128 bits and thus considers the value to be perhaps undefined. Anyway, next we do
_mm_andnot_ps which just computes ~a & b which in this case means that if the input
value was not less than zero we take the second operand (which is just the original value).
On the other side we take the unmodified mask and and it with (elem / 100), and then
coerce it into an int (meaning same bits, just different type). Then we perform the and.
So in short this is a selection between the original value and the value divided by one hundred depending if the value is less than zero or not.
Now we know all the stuff we need to know to implement the operations in the onnx.
(Cleaned up source of important stuff at the end)
ML magic
Well, it's not really machine learning, it's just modifying the graph a bit.
But first we need to load it into python. To do this we first install onnx
using pip and then load the model_dist.onnx using
import onnx
import numpy as np # for later

# the dimension for the custom operations, can be inferred from the
# compiled binary (inner loop is to 84, outer loop is to a variable we
# previously set to 64)
dims = (64, 84)

model = onnx.load("model_dist.onnx")
graph = model.graph
nodes = graph.node
Next we need to remove the three custom operation nodes. With a bit of trying I figured out that they are at index 14-16, so removing the 14th node 3 times will work:
nodes.remove(nodes[14])
nodes.remove(nodes[14])
nodes.remove(nodes[14])
Finally we can start implementing the custom operations, the first one is pretty easy. I first create two nodes which compute the sine and cosine respectively. Then I made their outputs inputs into an add node.
The make_node function takes as arguments the operation, then the inputs, the outputs and also a name for the node (which is optional). The first input is called pwny_ops::customop_1_29 and is the output of the Gemm node right before the custom operation.
nodes.insert(14,onnx.helper.make_node("Sin", ["pwny_ops::customop_1_29"], ["c1_a"], "c1_a"))
nodes.insert(15, onnx.helper.make_node("Cos", ["pwny_ops::customop_1_29"], ["c1_b"], "c1_b"))
nodes.insert(16, onnx.helper.make_node("Add", ["c1_a", "c1_b"], ["customop_1_30"], "c1_c"))
Note that they need to be inserted at the correct indices, because the graph must be topologically sorted. To test if we have correctly assembled the graph we could temporarily replace the customop_1_30 output with onnx::Gemm_32 and finally call
onnx.checker.check_model(g) to check the model. (Don't forget to change the output
back to customop_1_30, or whatever you call the input for the next custom operation).
Next we want to implement the x - tanh(x) part. I got stuck on this part for quite some
time because I wrote down 1 - tanh(x) into my notes and only realized when I reanalyzed the binary... Anyhow this node is pretty easy to implement, just two nodes:
nodes.insert(17, onnx.helper.make_node("Tanh", ["customop_1_30"], ["c2_b"], "c2_b"))
nodes.insert(18, onnx.helper.make_node("Sub", ["customop_1_30", "c2_b"], ["customop_1_31"], "c2_c"))
Last but not least the third custom operation, which requires a bit more work. First I create the part where we check if the numbers are less than 0, to do this I first need the constant zero, luckily there's a Constant operation which takes the values as a numpy array.
values = np.zeros(dims).astype(np.float32)
tensor = onnx.helper.make_tensor(
        name="const_zero",
        data_type=onnx.TensorProto.FLOAT,
        dims=values.shape,
        vals=values.flatten().astype(float)
    )
nodes.insert(19, onnx.helper.make_node("Constant", [], ["c3_a"], "c3_a",value=tensor))
nodes.insert(20, onnx.helper.make_node("Less", ["customop_1_31", "c3_a"], ["c3_b"], "c3_b"))    # x<0
So now we have if the value is less than zero for every element, next we have to
compute x/100 so we can actually use it if we need to. Again I needed a constant
matrix and then I used the Mul node (to exactly match the binary).
values = np.ones(dims).astype(np.float32) * 0.0099999998
tensor = onnx.helper.make_tensor(
        name="const_percentage",
        data_type=onnx.TensorProto.FLOAT,
        dims=values.shape,
        vals=values.flatten().astype(float)
    )
nodes.insert(21, onnx.helper.make_node("Constant", [], ["c3_c"], "c3_c",value=tensor))
nodes.insert(22, onnx.helper.make_node("Mul", ["customop_1_31", "c3_c"], ["c3_d"], "c3_d")) # x/100
Now with these two intermediate values we are ready to go, and fortunately for us there is a neat Where operation which is exactly like a ternary.
nodes.insert(23, onnx.helper.make_node("Where", ["c3_b", "c3_d", "customop_1_31"], ["onnx::Gemm_32"], "c3_e")) # ternary
Now with this we are done and calling onnx.checker.check_model(g) should run through.
Now we can export the model using onnx.save(g, "new_model.onnx")
I suggest you open it in Netron to avoid stuff like this: (When you have a wrong input)
Instead it should look like a neat graph like this:
At this point I'd like to thank onnx for a great documentation and many tools to inspect the graph.
And now all that's left to do is send the base64 encoded onnx file to the server:
(base64 -w0<newmodel.onnx;echo)|nc revop.chal.uiuc.tf 1337
and get the flag:
PwnyOps presents the flag: uiuctf{c00l_@nd_cr8t1v3_mL_0p5_fr0m_pwnY_0p5_!!!!}
Code
< TCTF | UMDCTF - POKéPTCHA >